Monday, September 5, 2011

Form & its many Forms.

Ceramic as a material is so plastic that it allows for variable forms.
For the lights that I am making, Thomas wants me to explore form more instead of plain simple cubes, rectangles, spheres. He says that when a material allows you to do so, why am I not exploiting it enough?
Instead of worrying only about the interaction I should really consider the form as well. He started to push me towards natural and organic forms asking me to even use bioluminescent creature forms if required.

Initially I was a bit apprehensive about this suggestion (considering the fact that I do not have enough knowledge about the claybody to be able to adapt it to any form possible and that it would move away from my initial theme of 'play' and then the interactions and forming not being cohesive) but after close consideration I have started to feel the same. A material should be used because it NEEDS to be used and not because it HAS to be used. 

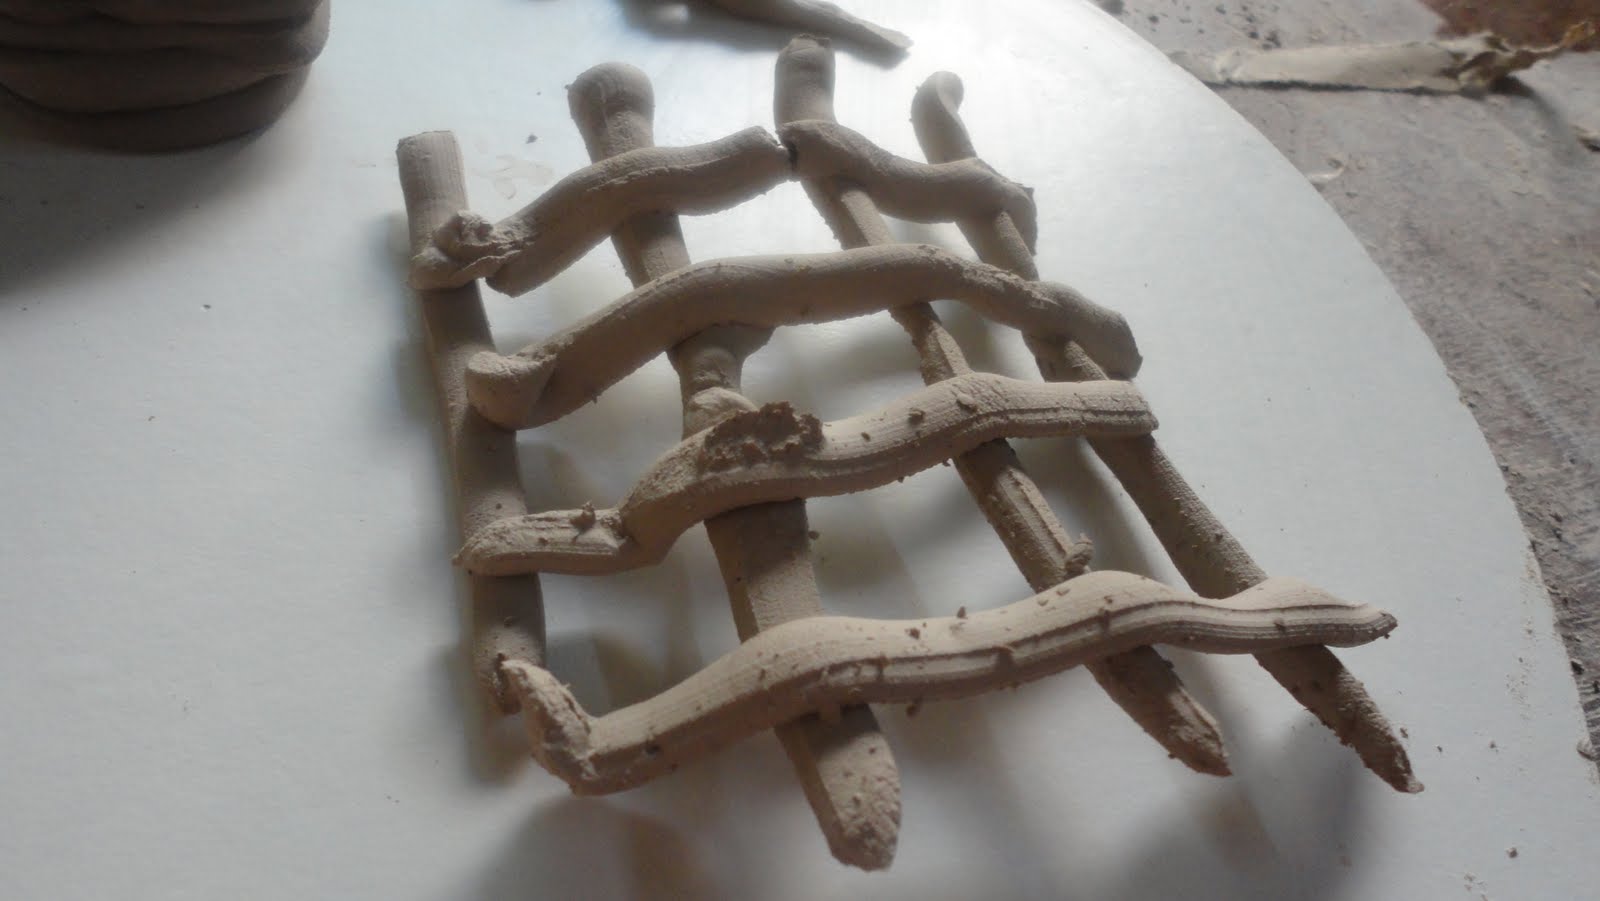
While looking at my theme of play and construction, I started getting attracted towards mazes, puzzles, tessellations and the likes. I have now realised that I can combine organic forms with the above to create that certain sense of INTRIGUE that is required in ceramic products.


An image for some inspiration.

Sunday, September 4, 2011

Material & Transparencies.

I was wondering what sort of light quality was possible out of slumped glass, bone china and the stoneware pieces. Also, I had no clue as to when the visit to the bone china factory was possible; so I took a sugar bowl and saucer made in bone china, a t-light lamp made in stoneware and held them against a bulb to see the sort of transparency the material possessed. 

Bone china is quite translucent (picture 1 & 2 below) whereas stoneware is opaque and allows light to pass though only from openings on the surface (picture 3 & 4 below).


The bone china and stoneware pieces when not held over a bulb (when light reflected on it).


It seems that a combination of the two materials could make a light piece dynamic and even add to the interaction.


Since I had no example of a slumped glass piece I took a picture of a light fitting in my house that emits light through a frosted glass sheet. I think this light quality is far from what fused+slumped glass can emit. I think due to the reheating and fusing process, surface texture and bubbles are formed in the glass piece which would only emit a inhomogeneous sort of a light quality exactly the opposite of what we see below.


I recently came across a slumped glass sink in a store. The image below gives an idea of the kind of texture and translucency expected from a slumped glass piece.


Saturday, September 3, 2011

Combing Glass in a Kiln


Fusing Glass & Bad Slump


Making a Fused Glass Sink


Clay and the works - Part 3

After working with clay and looking at many examples of stoneware fired pieces, varying in thickness or style of building, I started to realize that altering anything in the claybody will not help me in making the fired piece translucent to any extent. It could only help in making the claybody lighter. Opaqueness is a property of the stoneware clay and I should work with this property instead.

So a stoneware body can:
  • Block Light
  • Reflect Light (if finished like a mirror; eg: stainless steel, steel etc.)
  • Allow light to pass, through cavities
I started working on certain surface textures, patterns to see the possibilities of light emission.


Overall it was difficult to make sleek, close packed hollow patterns.
The hollow patterns had to be such that they only cut away parts of the surface and do not follow through and through (line type patterns).
The patterns should be attached to one another, there can't be a pattern running in another (if the first pattern has to allow light to pass through and needs to be cut out).
The claybody has a tendency to appear crude.

Friday, September 2, 2011

Clay and the works - Part 2

Paper Clay is a mixture of ordinary clay with ordinary paper fibre, giving the resulting material surprising and helpful properties like increase in plasticity, dramatic reduction in shrinkage and magical improvement in adhesion (wet on dry and vice versa).

Paper clay is mixed roughly in the proportions of one quarter wet paper fibre (shredded paper, egg cartons, newspaper - uncoated) to three quarters of wedgeable plastic clay. It can not only be sculpted into intricate forms, not crack as it dries, but also into the kind of form that needs a metal armature, and would therefore normally be moulded and cast, will hold itself together unaided to be fired.

Paper clay appears to be slightly more brittle than pure clay when biscuited, and it can be aesthetically more unpleasing when a pot is unexpectedly light in the hand.

The cellulose fibers in paper pulp are like hollow drinking straws, hygroscopic, taking water out of the clay but remaining flexible. The fibers when mixed in clay are almost invisible to the naked eye, and the holes they leave when the pot is fired are equally tiny, so the surface is unblemished and as ready to take glaze as any other biscuit ware.

A few pointers on paper clay from the book 'A Complete Potter's Companion' by Tony Birks:


  •  Have one bucket for wet paper pulp, another for thick clay slip. Mix them in a third bucket with your hands, or if you wish, a powerful food mixer.

  • Pour out the porridge-like mixture on to an absorbent surface, such as a plaster bat, and spread it out to an even thickness using a straight edge.

  •  When the paper clay has dried out to the consistency of plastic clay, roll it up and wedge it. It is now ready to be used or it can be stored.

  •  Scrim or Bandage soaked in paper clay slip can be used on an armature to build up a sculptural form. More layers can be applied with a paintbrush.

  • Bone dry slabs of textured paper clay can be joined using wet paper clay slip, without the usual danger of the finished pieces falling apart.


PAPER CLAY AT MONKEY BUSINESS

Method: 
PAPER PULP - Shred papers into small pieces and soak in water for about an hour. Once soaked shred the paper pieces further. Use a drill or grinder to mash up the soaked pieces to make a very fine pulp. 

*Tips (for making Good Pulp)
-Take a handful of the pulp and add it to a glass of water, if the mix looks homogenous the pulp is
  ready to use but if u still see pieces of paper floating around, grind the pulp further.
-Do not use shiny coated art paper/newspaper. Although this already has china clay in it, which one
 might think would be helpful, it has been glued in with waterproof latex resin, and does not break
 down in water.


* Paper pieces in its initial soaking stage.

SLIP - Make a good amount of slip (triple the amount of the pulp) by soaking dried or unfired pieces of clay in water for a day or two, to get the right consistency.


* Unfired clay pieces used to make slip.


* Clay pieces after a day of soaking in water.

The paper pulp and the slip have to be still mixed together at the right consistency for use.

A few pictures of a paper clay bowl made at the studio of a bone china factory in Ankleshwar, Gujarat. The clay used here is bone china. The bowl is paper thin, but extremely brittle and has to be handled with much care. Watching, touching/feeling the paper clay bowl gave me a better understanding of the possibilities of the material.


More on the bone-china factory in my posts to come.

Thursday, September 1, 2011

Clay and the works - Part 1

My mentor, Thomas, told me about a few characteristics that are intrinsic to the material clay and also things I should consider while working with it:
- Stoneware (claybody fired to 1200 degrees celsius) is opaque. (This would be a major challenge for building lights.)
- Brittle and has high possibilities of breaking or chipping.
- The body is such that it doesn't allow for extremely thin cross sections (cracks during firing) which means that most products are heavy and very large forms shouldn't be handled too much (handling too much increases the risk of breaking or chipping)
- the material allows easy malleability into any type of form or surface texture

I decided to work on different techniques of form building to reduce the weight of the clay body and also allow light to pass through.
  1. Delicate Forms: I wanted to utilize the technique of coil building to create some forms which would have holes in the surface for light to pass through. 
  • Coil+Slab+Pinching: I tried making a spiral shaped bowl using a combination of Coils and slabs and pinching them together. 


      While doing so I realized that:
          a. the clay body wasn't plastic enough and this was because the raw material used in the clay
              body wasn't ground very well.
          b. very fine (2-3 mm cross section) coils couldn't be rolled out due to the large particles in the
              clay causing it to dry out and start cracking.
          c. the form was too delicate to hold the together and needed support (a bowl I made it in).


          d. post drying the form was so delicate that on removing from the bowl, it just crumbled down.
              this meant that the coils needed some reinforcement.
          e. the crumbling could have been prevented by keeping the form in the bowl itself and brisk
              firing it, but if glaze had to be applied and fired in the bowl again (same one used as support
              before) the two would just stick together, besides the spiral shaped bowl would still be too
              weak to handle even post brisk firing and extremely unsuitable for a piece that needs to be
              handled a lot (if that be the interaction).

  • Piping Bag: While looking at some porcelain forms I wanted to recreate the delicateness in the stoneware clay body. I decided to look at making fine coils (after my attempt at rolling them out failed) by using a piping bag (like the ones used in decorating cakes) to get uniform sized cross sections of the coils so that they don't crack while rolling.
          Method Adopted:
          I took a plastic bag and mixed some kneaded clay with water in different percentages to get
          different consistencies.    
          
          While filling the bag I made sure to pack the 'thick slip' into the bag so as to avoid any air
          bubbles forming in the clay body. This was to allow the clay to flow out of the bag effortlessly
          and continuously.

      
             I took a plastic bag and wrapped it around a cylinder, this formed the base on which the coil
             patterns were squeezed out. The base had to be such that it was adaptable enough allowing
             any shrinkage of the clay body and facilitated the removal.


             I also made a clay consistency that was thicker than slip (this is a clay and water consistency
             that flows like paint) but thiner than the kneaded claybody and used a lens solution bottle to
             pour the clay out, while making a pattern.


            Even after taking all the precautions possible not to allow any air bubbles into the piping bags,
            the coils did spurt out a bit or depending on the way the bag was held made coils of different
            cross sections.


            In all I tried three different type of consistencies: thick, paste-like and watery; to check which
            one of these would give the best results and mainly not crack after drying.
            The one with a paste-like consistency (left) was the best and most convenient to use: flowed out
            easily and made more uniform coils.


            I then let everything rest for 2 days to dry(due to bombay rains and nothing drying easily) so as
            to conclude if the experiment was successful enough or not.

            Post drying, most of the coil work came off the plastic sheet easily. Some lasted the removal 
            while some broke immediately. The ones that survived were extremely brittle and had to be 
            handled carefully and delicately.


           The coils made out of the thick consistency had taken the shape of the container I had squeezed
           them out on, but on close inspection I observed that some coils had cracked and the piece wasn't
           strong enough to be utilized in any manner.


            The coils made out of the paste-like consistency came off easily but on touching again it just
            cracked. This was because the coils were way to delicate and lacked consistency in thickness in
            some parts. I also assume there were still some air bubbles created in the clay body while
            packing the piping bag.


            The coils made out of the watery consistency were extremely brittle and cracked while peeling,
            besides the amount of water in the clay was too much for the forms to hold and most of the
            pattern got discombobulated.


I discussed all of this with my mentor and he told me that maybe an extruder would be the best device for such coils, but he also added that it would still be difficult (almost impossible) to get the sort of delicateness I was aiming for because of the kind of clay (stoneware) being used. He said that such strength wasn't an intrinsic quality of the clay body.

Monday, August 29, 2011

Moodboards.

These mainly look at the possibilities of style, form, colour and interaction.


images from www.pinterest.com and google.


From each of these I see a possibility in interaction which can be divided in the following manner:


I think the themes are broad and flexible enough to allow or accommodate material versatility/constraints (gathered by previous knowledge or after exploring the material better).


Mindmapping.


I did a small mindmap trying to see the possibilities with the theme but at the same time bearing in mind the following:
- the products I intend to design: lamp types, novelty
- the material: possibilities, limitations
- interactions: mechanical or electronic.
- Client's strengths and limitations


(click on image to enlarge)

While doing this I categorized the various topics that seemed to be emerging with respect to the scope of the project.

Visa et al.

I have been asked time and again, why I haven't updated my blog for the past two weeks.
Well, it just so happened that right after I got back from my review in Bangalore, I was working on my Visa application and it did consume a lot of time. After a week of going back and forth between the German Consulate, Deutsche Telekom AG and gathering all the paperwork required, I finally own a Visa for Deutschland.
YAY. :)

You will see more on my progress with respect to the project in a day or two.

Saturday, August 13, 2011

Play it is.

So after hitting my head against the wall trying to find a suitable theme for the interactions and asking my myself a hundred times 'What exactly is the play I propose to achieve?', I began looking up the word 'play' itself.

play

(verb)

- To occupy oneself in amusement, sport, or other recreation

- Engage in activity for enjoyment and recreation rather than a serious or practical purpose


I was still unsure of what I wanted to do then. While still looking up images for 'play', somehow this image really hit me.


Somewhere I began to realize, that using Play as a theme actually made the most sense as it was broad with many meanings and connotations (giving me enough to find something suitable in context with the project). Its an antonym (not literally but in some sense) of the word mundane, that my project talks about i.e. doing away with the mundane interaction of a piece of light. And I would be literally be 'Playing with Light'.